Overview
This article informs the reader how to use Yuja to create and submit video recordings to Canvas as a student.
Before you begin...
Be prepared to provide your MSU Denver credentials and authenticate your login with MFA. You will also need to download and install the Yuja software to your device if you have not already. If you need to download and install Yuja, take a look at the How do I download and install Yuja? knowledge base article.
Instructions
The process for students to record and upload a presentation has two steps:
- Recording your presentation
- Submitting the presentation via Canvas
- Request Auto-captions
- Edit Captions
Recording your presentation
- Open Yuja and login select the option for Metropolitan State University of Denver SSO.

- Click on the Settings link at the top right corner of the YuJa Software Station window.
- Click on screen capture tab and change the resolution to 1280x720 or higher.
- Click the Save button to save your settings changes. Yuja may close after this step to apply the settings. You can reopen the app by searching for Yuja in either Mac's Spotlight Search (magnifying glass in the top right of the desktop), or Windows Search (search bar at the bottom left of the desktop).
- Setup the YuJa recording settings before starting your recording:
- Type the title of your recording in the Title box.
- Type a description of the video in the Description box
- Click on the Video button, ensure the Video source is set to “On” and select your camera.
- Click on Audio button, ensure the audio source is set to “On” and select your microphone.
- Click on the Screen button, and ensure that it is set to “On”. If you have dual monitors, click on Advanced settings and select which monitor you wish to record from.
- Ensure that the following items are visible in the previewing area:
- Your camera in the Video Source window
- Your screen in the Screen source window
- When you speak, the audio level changes in the Mic Source window

- Click the “Start” button to begin recording.

- When you are finished recording click on the stop button in the lower right-hand corner of your screen.

- Click on the “Save” button and the recording software will automatically close.

- Wait 5-10 minutes for your presentation to upload and start processing.
- Return to your web browser, and navigate back to the https://msudenver.yuja.com website.
- Click on the Manage Media button.

- Click on the Default Collection folder

- Confirm you see your recording; you can click on the play option to review your recording before submitting to the location your instructor has provided in Canvas. Note the option to play the recording may not appear until the recording is finished processing, which can take 20-40 minutes (depending on the length of the presentation).

- You are now finished with recording your presentation. You may exit all open programs and log out of Canvas.
Submitting your recording via Canvas
- Visit https://msudenver.edu/studenthub.
- Click on the Canvas button to log in to Canvas.
- Access the content area of the course where you are asked to upload a video (e.g. where you are submitting the assignment)
- Select the Apps icon (it looks like an electrical plug).

- Scroll down in the Select App box that appears.
- Click YuJa.
- Navigate to your video by typing the video name into the search bar or by scrolling down in the video list.
- Click the video name or thumbnail.
- Wait for the video to load into the submission box.
- Click Save.
Request Auto Captions
Captions should be automatically created for you and available within 24 hours after uploading. If this is not the case you can request auto captions.
- Find the video in Yuja and place your mouse over the video and select the More button.

- Once you select the more you can look at the general area to see if the video has been captioned or in the process of captioning under Caption Status

- If caption status is not pending or success you can request captions. Select the Accessibility on the left and then select Auto-caption.

- Select the Caption Language of the video and select Send Caption Request.

- Captions will be added to the video automatically within 24 hours
Editing Captions
The Video Editor offers a full-featured caption editor that includes the ability to add, change, delete captions, or alter the timestamp associated with a caption.
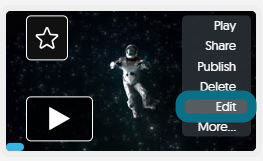
- Hover over the video you want to edit and select Edit to open the Video Editor.
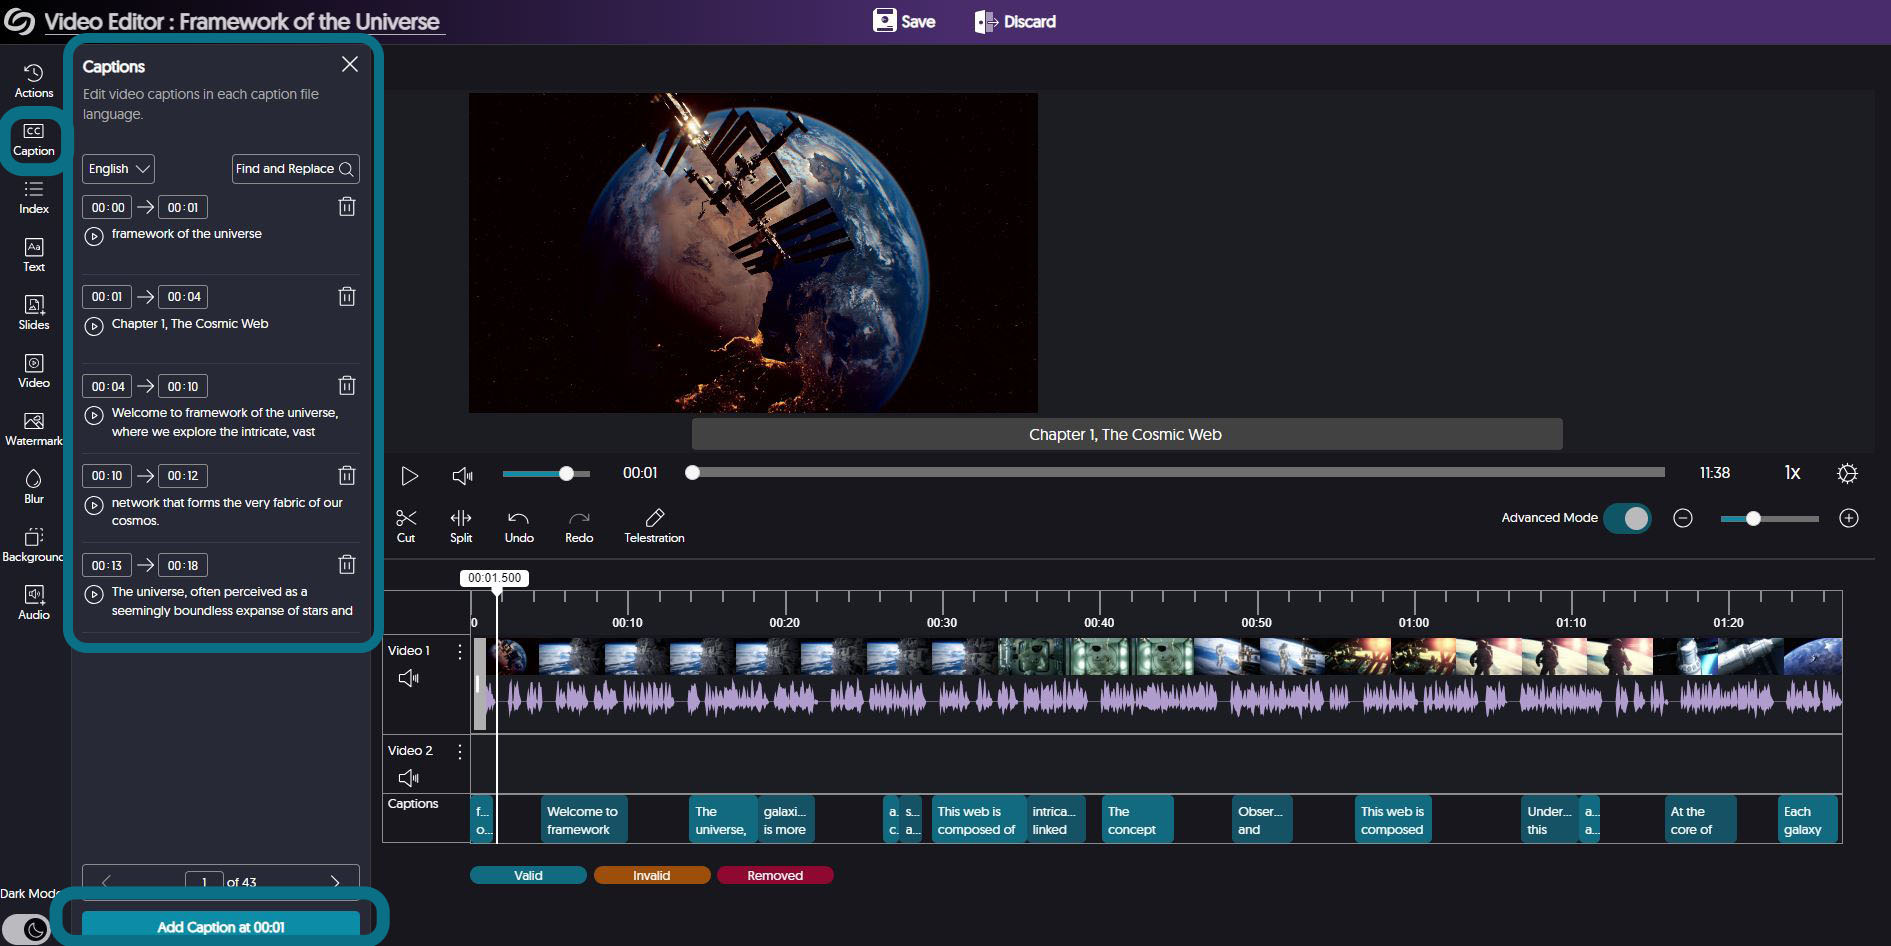
- In the side panel, click Caption to pull up all the closed captions.
- Edit the caption based on your needs. The available actions include:
- Update the closed-captions timestamps: Enter the new start and end times for each caption.
- Edit the closed-caption texts: Change the caption text in the caption text box.
- Delete a closed-caption line: Click the Trash icon next to the designated caption.
- Add a new closed-caption line: Click Add Caption at mm:ss (i.e. 00:01) and add a new caption.
Result
Your video presentation has now been recorded, saved, and attached to the content area of the course you were working in.